OpenClaw Skills Installation & Configuration Guide - Step by Step
OpenClaw Skills are modular extensions that teach the AI agent how to interact with external...
A practical guide to supercharging your Cursor AI with specialized capabilities.
Agent Skills in Cursor are like giving your AI coding assistant a library of specialized knowledge. Instead of explaining the same workflows over and over, you package them once as skills that Cursor loads automatically when relevant.
The key difference from Rules:
- Rules = Always on, always in context (like company coding standards)
- Skills = Loaded dynamically when needed (like "how to debug GitHub Actions")
This keeps your AI's context clean while giving it access to deep expertise.
⚠️ Important: Agent Skills are currently available in Cursor's Nightly channel only. The feature is rolling out and may become available in stable releases soon.
Cmd + Shift + JCtrl + Shift + JAfter restarting:
1. Open Settings again
2. Navigate to Rules, Skills, Subagents
3. Skills should now appear under "Agent Decides"
If you don't see the toggle, make sure you're on the latest Nightly build and restart again.
Cursor looks for skills in these locations:
your-project/
├── .github/
│   └── skills/
│       ├── debug-actions/
│       │   └── SKILL.md
│       └── test-playwright/
│           └── SKILL.md
Or use the legacy path:
your-project/
├── .cursor/
│   └── skills/
│       └── your-skill/
│           └── SKILL.md
~/.copilot/skills/
└── my-workflow/
    └── SKILL.md
There are thousands of ready-to-use skills available. Here's how to get them:
Claude, Cursor, Codex, Antigravity and more (open SKILL.md ecosystem) agentskillsrepo.com provides a handy installer:
npx skills add vercel-labs/agent-skills
This automatically clones skills into your project and sets up the directory structure.
SkillPort is a CLI tool that makes skill management dead simple:
# Install SkillPort
pip install skillport
# or
uv tool install skillport

# Add skills from GitHub
skillport add anthropics/skills skills
skillport add github-username/repo-name path/to/skills

# List installed skills
skillport list

# Update all skills
skillport update

# Validate your skills
skillport validate
The fastest way to discover and install skills is through agentskillsrepo.com
For React/Next.js projects, Vercel provides a handy installer:
npx add-skill vercel-labs/agent-skills -y
This automatically clones skills into your project and sets up the directory structure.
.github/skills/ or .cursor/skills/ foldercode-review
- Reviews code for bugs, style, and improvements
- Use when: You want automated code review feedback
playwright-testing
- Creates and debugs browser tests
- Use when: Testing web applications
git-workflow
- Automates Git operations and PR creation
- Use when: Managing branches, commits, and PRs
pdf-processor
- Extracts text, fills forms, merges PDFs
- Use when: Working with PDF documents
markdown-to-slides
- Converts markdown to presentation format
- Use when: Creating presentations from docs
brand-guidelines
- Ensures content follows company branding
- Use when: Creating customer-facing content
communication-templates
- Standard templates for emails, reports, docs
- Use when: Writing business communications
Let's create a simple skill for reviewing React components:
mkdir -p .github/skills/react-reviewer
cd .github/skills/react-reviewer
SKILL.md---
name: react-reviewer
description: Reviews React components for common issues and best practices. Use when reviewing React or Next.js components.
---
# React Component Reviewer
## What this skill does
Reviews React components for:
- Hook dependency issues
- Unnecessary re-renders
- Missing key props
- Accessibility issues
- Performance concerns
## Review process
1. Check component structure and naming
2. Verify proper hook usage
3. Look for prop drilling
4. Check for missing TypeScript types
4. Identify performance bottlenecks
5. Suggest specific improvements
## Output format
**Structure Issues:** Component organization problems
**Hook Problems:** useEffect dependencies, custom hook issues
**Performance:** Re-render concerns, memo opportunities
**Accessibility:** Missing ARIA, keyboard nav issues
**TypeScript:** Missing types or improper usage
**Recommendations:** Specific code changes
Be constructive and explain WHY each change matters.
Open Cursor's Agent chat and ask:
Review this component for issues
Cursor will automatically load your skill when it's relevant!
Skills can include executable code. Here's an example:
debug-skill/
├── SKILL.md
└── scripts/
    └── analyze.py
SKILL.md:
---
name: performance-analyzer
description: Analyzes code performance and suggests optimizations.
---

# Performance Analyzer

Run the analysis script to identify slow operations:

```bash
python scripts/analyze.py <file-path>
The script checks for:
- O(n²) operations
- Unnecessary loops
- Large object copies
- Synchronous operations that should be async
**scripts/analyze.py:**
```python
#!/usr/bin/env python3
import sys
import ast

def analyze_performance(filepath):
    with open(filepath, 'r') as f:
        tree = ast.parse(f.read())

    # Your analysis logic here
    issues = []

    # Example: Find nested loops
    for node in ast.walk(tree):
        if isinstance(node, ast.For):
            for child in ast.walk(node):
                if isinstance(child, ast.For):
                    issues.append(f"Nested loop detected at line {node.lineno}")

    return issues

if __name__ == "__main__":
    issues = analyze_performance(sys.argv[1])
    for issue in issues:
        print(f"⚠️ {issue}")
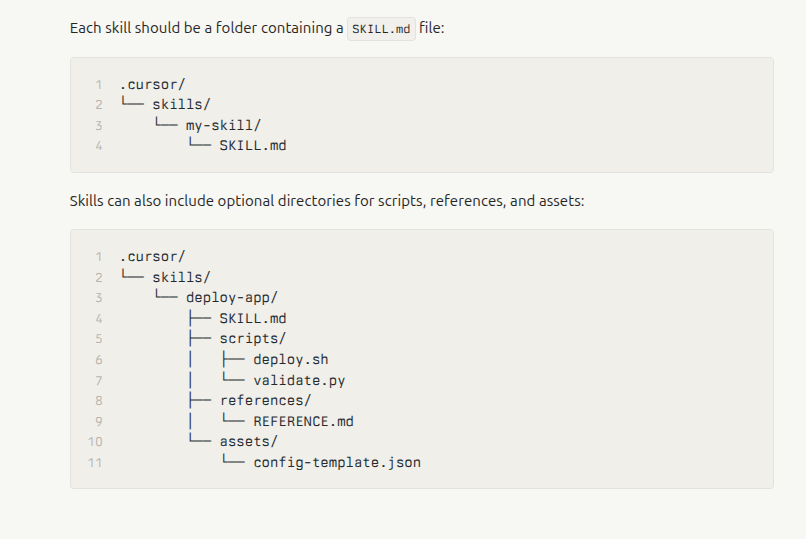
For complex skills, split documentation into smaller files:
complex-skill/
├── SKILL.md
└── references/
    ├── api-guide.md
    ├── examples.md
    └── troubleshooting.md
Reference them in your SKILL.md:
For detailed API information, see [API Guide](references/api-guide.md).

For examples, check [Examples](references/examples.md).
Cursor loads these on-demand, keeping context efficient.
| Use Rules When | Use Skills When |
|---|---|
| Coding style must always apply | Specialized workflows (testing, deployment) |
| Company standards are mandatory | Task-specific knowledge (PDF processing) |
| Context needed in every chat | Complex multi-step processes |
| Short, always-relevant instructions | Scripts or executable code needed |
Example:
- Rule: "Always use TypeScript strict mode"
- Skill: "How to debug GitHub Actions failures"
Move detailed docs to references/ folder. Cursor loads the main file first, then references on demand.
❌ Bad: description: Helps with React
✅ Good: description: Reviews React components for performance, hooks, and accessibility issues. Use when reviewing .tsx files or React code.
Add words users might say:
- "debug", "fix", "analyze" for debugging skills
- "create", "generate", "build" for generator skills
- "review", "check", "validate" for review skills
Before committing, test with actual prompts:
Review this component
Debug this GitHub Action
Extract data from this PDF
Structure skills from general to specific:
- Main instructions in SKILL.md
- Detailed examples in references/
- Code in scripts/
Use Git to track changes. Skills are just files, so version control works perfectly.
Here's a production-ready skill for Next.js projects:
---
name: nextjs-reviewer
description: Reviews Next.js code for performance, SEO, and best practices. Use when working with Next.js or App Router code.
metadata:
  author: your-team
  version: "1.0"
compatibility: Next.js 14+
---

# Next.js Best Practices Reviewer

## What this reviews
- Server vs Client Component usage
- Data fetching patterns
- Metadata and SEO optimization
- Image optimization
- Route organization
- Performance issues

## Review process

### 1. Component Placement
- Check if component should be Server or Client Component
- Verify 'use client' is only where needed
- Look for Client Components that could be Server Components

### 2. Data Fetching
- Prefer Server Components for data fetching
- Check for fetch() cache configuration
- Verify proper use of async/await
- Look for waterfall requests

### 3. SEO & Metadata
- Check for proper Metadata API usage
- Verify OpenGraph tags
- Look for missing alt text on images
- Check for proper heading hierarchy

### 4. Performance
- Verify next/image is used for all images
- Check for large client bundles
- Look for unnecessary client-side JavaScript
- Check font optimization

### 5. Best Practices
- Verify proper file naming (lowercase with hyphens)
- Check for co-located components
- Verify proper TypeScript types
- Look for hardcoded URLs (should use env vars)

## Output format
Provide specific feedback in these categories:
1. **Critical Issues:** Must fix (breaks app or SEO)
2. **Performance:** Impacts load time or UX
3. **Best Practices:** Improves maintainability
4. **Suggestions:** Nice-to-have improvements

For each issue:
- Explain what's wrong
- Show the specific code location
- Provide a fix with code example
- Explain why it matters

## Common patterns to watch for

### ❌ Bad: Client Component with data fetching
```typescript
'use client'
export default function Page() {
  const [data, setData] = useState(null)
  useEffect(() => {
    fetch('/api/data').then(r => r.json()).then(setData)
  }, [])
}
export default async function Page() {
  const data = await fetch('/api/data', { cache: 'no-store' })
  const json = await data.json()
  return <div>{json.title}</div>
}
<img src="/hero.jpg" />
<Image src="/hero.jpg" alt="Hero" width={1200} height={600} />
For App Router migration: App Router Migration
For SEO optimization: SEO Guide
## Troubleshooting

### Skills Not Showing Up

1. **Check Nightly channel:** Settings → Beta → Update Channel
2. **Restart Cursor:** Completely quit and reopen
3. **Verify directory:** Must be `.github/skills/` or `.cursor/skills/`
4. **Check SKILL.md format:** Validate with `skillport validate`

### Skills Not Loading

1. **Check file name:** Must be exactly `SKILL.md` (case-sensitive)
2. **Verify frontmatter:** Must have valid YAML with `name` and `description`
3. **Check permissions:** File must be readable
4. **Look at logs:** Check Cursor's output panel for errors

### Agent Not Using Skills

1. **Be explicit:** Mention the skill name in your prompt
2. **Check description:** Make sure keywords match your task
3. **Verify activation:** Skills should show "Agent Decides" in settings
4. **Simplify prompt:** Sometimes over-explaining confuses the agent

## Resources

### Official Documentation
- [Cursor Skills Docs](https://cursor.com/docs/context/skills)
- [Agent Skills Specification](https://agentskills.io/specification)
- [Anthropic Skills Examples](https://github.com/anthropics/skills)

### Skill Marketplaces
- [SkillsMP](https://skillsmp.com/) - Community marketplace with thousands of skills
- [Vercel Agent Skills](https://github.com/vercel-labs/agent-skills) - React/Next.js focused
- [Agent Skills Hub](https://www.cursorhow.com/en/agent-skills-hub) - Curated examples

### Tools
- [SkillPort](https://github.com/gotalab/skillport) - CLI for managing skills
- [skills-ref](https://github.com/agentskills/agentskills/tree/main/skills-ref) - Validation library

### Community
- [Cursor Forum](https://forum.cursor.com) - Questions and discussions
- [Agent Skills Examples for Vibe Coders](https://agentskillsrepo.com/news/agent-skills-examples-for-vibe-coders) - Simple examples

## Quick Reference

### Skill Structure
skill-name/
├── SKILL.md # Required: Main instructions
├── scripts/ # Optional: Executable code
├── references/ # Optional: Detailed docs
└── assets/ # Optional: Templates, images
### SKILL.md Template
```markdown
---
name: skill-name
description: What it does and when to use it.
---

# Skill Title

## When to use
- Scenario 1
- Scenario 2

## Process
1. Step 1
2. Step 2
3. Step 3

## Output format
Describe the expected output

## Examples
Show concrete examples
# Install SkillPort
pip install skillport

# Add skills
skillport add anthropics/skills skills

# Validate
skillport validate

# List installed
skillport list
Agent Skills transform Cursor from a smart autocomplete into a specialized coding assistant that knows your exact workflows. Start with community skills, then build custom ones for your team's unique needs.
Remember: Skills are just markdown files. If you can write documentation, you can create skills. The magic is in how Cursor loads them dynamically, keeping your AI's context clean while giving it deep expertise exactly when needed.